Showing posts with label Character Design. Show all posts

Tuesday 18 June 2013

Spaceman Pose and lighting Test

Hey everyone, 

Sorry its been a while since my last post, I have been super busy making preparations to move from Auckland down to Waihola and have not had too much time to put towards my own projects. I will be moving on the 21st so will more than likely be offline for a week or so until we can get everything straightened out again in the South Island.

In the mean time I have been busy recording my brain waves onto the school hard drives so that a small part of me can live on and manipulate the minds of future generations of south seas animation students!

On my own front I have been testing the spaceman rig and ironing out any bumps, kinks, and bruises in the rig so that he is ready for the school project which starts production on the 8th of July. Our second year students are busy working on pre-production design work for the world, props and vehicles as we speak.

All I can say is that the project is looking like its going to be a doozy this year, and I will be looking forward to seeing the completed product.

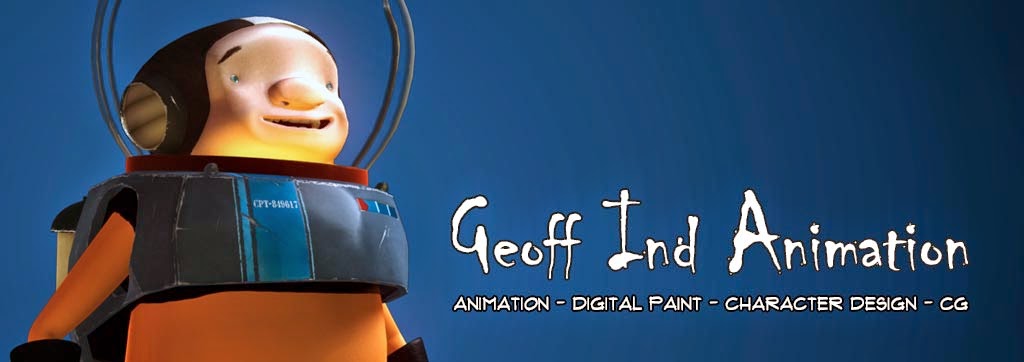
Posed and lit test render of the "Spaceman".

Thursday 2 May 2013

Future Projects...

Hello everyone,

I am still waiting on my Spaceman character's rig to be completed by my rigging guru. I have been working with Dan closely to ensure that all of his controls allow for a really wide range of expression and character. So far the rig is looking uber cool. I just cant wait to get into posing, which should be happening very soon. So keep your eyes peeled for that.

In the mean time while I wait, I have been really busy at South Seas preparing for the next set of classes I am teaching with our first year group. I have also been mulling over a few sequences that I want to use my new rig in. I'm nearly there with a few idea's and I'll start boarding it up on paper soon.

I have also been steadily adding a few more projects to the list of things that I can move on to when the spaceman is complete. In my last post I shared a character design that I want to develop more and use in a short story that my wife and I came up with. I also recently designed another character that I hope to learn more about rigging for character animation with (mainly because he is very simple rig wise). Hopefully if I pick up more of the rigging process I can get more of my characters ready for animation in the future.

Anyway here he is!


Snail Turnaround from Geoff Ind on Vimeo.

Tuesday 30 April 2013

Tortoise Character design and Digital Painting

At the moment my spaceman character is currently being rigged for animation by a rigger extraordinaire. I am really looking forward to moving him around and giving him some character! I hope to have the rig in my hands soon but in the mean time I thought I'd share a character design I painted up late last year with you. 

I initially designed him for a short film Idea that my wife and I came up with. I still may get back into developing our idea further but for the time being it has been put on a shelf until I have more time to devote to a larger more fully realised short film.

Tortoise Orthographic views.
I really like his shell, especially the dimension that the segmented shapes give it. Hopefully I can find the time to develop him a bit more and them translate him into the 3D world!

Take care,

Geoff.

Monday 22 April 2013

Texturing nearly complete

Texturing for the spaceman is nearly complete, I was hard at work on the textures and shading network for his main body mesh all weekend which only leaves his chest pack and some small tweaks left to do on his helmet glass shader (I'm still not happy with the way the specular is rendering, I will probably have to paint a custom specular map to get them to look right).

Any who I thought I would give you a sneak peak at progress so far before I do a more comprehensive breakdown of the shaders and textures.

This is my current progress so far, showing my shading network for his layered shader.
His colour render pass is taking a bit too long at the moment it came in a t just over 5 minutes on my computer here at work! It renders heaps faster on my machine at home but it looks like I will still have to do some optimisation so that he renders a little more speedily.

Here is a more close up view.

Spaceman complete textures.

And the layered shader for his body mesh.

Layered shaders are fantastic, especially when texturing an object or character with multiple types of material.

Hope you enjoy, I'll be back soon with another update.

Thursday 11 April 2013

Using reference when planning texture and surfaces for a 3D character.

I have just completed the texture/material swatch sheet for the Spaceman. This sheet will be used to inform allot of my decisions regarding materials for each of the different areas of my character.

I will be using it to help incorporate more detail that I would not normally have thought to include if I there was not a sheet to look at to help guide the texturing process. I also like to use it to identify material attributes that help to distinguish one type of material from another, for example glass and scuffed painted metal. Both are a hard smooth surfaces but glass will have a sharper specular highlight than the metal surface.

Here is my swatch for the character, this version is way smaller than the original file. The idea with a texture/material swatch is that you can zoom right in close to the texture to observe as much of the detail as possible. Unfortunately this means that the actual file usually absolutely ginormous, this one is over 13,000 pixels wide and nearly 10,000 pixels high! Way too large to upload on my blog.


Texture and Surface material swatch sheet, FOR REFERENCE PURPOSES ONLY.
Just a quick word on using reference material.

I personally think using reference material to help inform your craft is a great thing.

Reference when used properly, can't help but make whatever it is you are drawing, painting, sculpting, etc more detailed and rooted in the real world. When used incorrectly however i.e. copied reference material can make your images look disjointed and muddled.

I mainly use reference as a tool to inform me about small details that often get over looked by the lay person. For example I keep a library of images and video files of a huge range of subjects so that if I'm designing or drawing anything from a deserted run down old street to a pristine street I can look at images of ruins, brickwork of varying ages and levels of decay so that I can accurately draw and place small details into my image to help root it in reality. for example where weeds usually start growing from or where dirt and debris usually accumulates. 

I also use reference to help me draw or paint things that I have never painted before, an artist rarely if ever has painted or drawn every single type of tree known to man so when drawing something new, I always use reference to help me get started. A recent example of this was when painting the underwater scene from an earlier post I had never drawn or painted light reflecting off of water before as caustics. So I had to get heaps of reference images of reflections of water to have a look at patterns etc so that my painted caustic patterns looked vaguely realistic and correct at a glance.

Looks like I'll be working on a commercial job for the next week, so I'll try and post more of my progress afterwards.

Wednesday 10 April 2013

3D Character design, creating UV's for the Spaceman

Hello everyone,

I thought I'd better write a quick update for my latest project so here goes. 

Character modelling is now complete. It took a little longer than I expected because of all of the extra little pieces of geometry that I had forgotten I would need around his arms and under the chest pack etc.

I have also just completed the UVing process which I actually quite enjoyed! 

The UV's for any model, be it a character or other object, after modelling usually look something like a crazy spaghetti monster on steroids, see below.

Spaghetti monster UV's in Maya.
For the non 3D user out there, the UVing process is where you take a three dimensional character or object and cut it up into smaller bits. So that you can lay it out flat, and then paint on the surface in a 2D paint program like Photoshop. 

Its pretty much like just like when you used to pull apart a box template when small, only way more complicated and inside a computer screen.

When approaching UV's for a character, a handy little way that I use to think about it. Is to imagine where all of the seams are on everyday clothing. Nine times out of ten the seams of a 3D character are in very similar spots. This really helps when planning where to cut a character up.


UV's now complete and laid out nicely ready for paint.
One of my favourite things about this UV map is his body in the bottom left of the UV space. It looks exactly like a baby romper suit! Hilarious when I had just done it and realised what it looked like.

As mentioned above, now that the Spaceman is fully UV'd I can bring his UV maps into a 2D paint program. I will be using Adobe Photoshop to paint up his textures and make him look way cooler than the default Lambert shader that he currently has applied.

My next task before painting him is to do some research into the materials that I want to use. I will need to get some good reference material for each. Google images is great for the more generic material types but I will also go running around with my camera for some of the more specific materials and details that I want to include.

So without further ado I'm am going to get stick in, I'll post another update again soon.

Thanks for reading!

Geoff

Friday 5 April 2013

Designing a 3D character from start to finish.

Firstly, sorry for the lack of posts of late. I have been completely consumed with teaching and a new project recently. 

I have recently been teaching my students at South Seas aspects of character design, and as part of the character design classes each student designed a character. As usual while my students are having fun drawing and designing it really gets my creative spark going, and of course I had to join in and design my own character!

This time I thought why not use the character I design to help me tackle character modelling in Maya. Something I have always wanted to get better at but not had the spare time required to really develop my skills.

Coincidentally I also needed to diversify my reel a little more with some new 3D work. So why not kill two birds with one stone.

I had a really clear idea of the type of character that I wanted to design right from the start. I wanted to design a spaceman character that has very short body proportions but at the same time not look like a child (often a problem when designing characters that are around the 3 head high mark). I also wanted him to have a space suit consisting of a breathing chest pack, air tanks and helmet.

As always I start my design on paper, working out the basic shapes and proportions of what I had in my mind.


First Concept Sketch.
As you can see my sketches start out very ruff and basic using simple shapes to get down on paper, what I have in my head really quickly. 

When designing like this I will go through a series of drawings where I play with shapes, proportion, detail, contrast, and appeal. Trying to polish and simplify the design but still keep the character interesting.

For the spaceman character I had something I was happy with really very quickly. I think I spent about 45 -50 minutes drawing all of the concepts and had my character ready for development stage.

                                                              
Second Concept Sketch.
Last Concept Sketch with Final Character in pose.
With my final character concept in hand, I develop my character for as long as necessary to work out the kinks in my concept. Again, I already had pretty much what I wanted in the character as there was not much development required. However I did make one change to the character and that was to lift his heap up a little so that his mouth could be seen above the level of his space suit. 

I really liked this aspect of his character, but having his mouth out of view would have had ramifications for animation down the line. I would have had to compromise acting and animation to make shots where he is talking read properly.

My plan is to incorporate this back into him during the rigging stage. 

See you can have your cake and eat it too!
 
Developed character before and after head shift.

As you can see I have already started to think about colour. My ideas are kind of a mix of Apollo space program and Star War's Rebel pilot with the black and white skull cap and the orange flight suit. Later in the process once I have completed the modelling and UV's, I will create a swatch sheet with samples of textures, colours and material types that I want to incorporate into his design.

I also intend to use this project to learn and develop a pipeline to incorporate the use of Autodesk Mudbox into my work process. I want to use Mudbox to sculpt extra detail into the character's and export bump, normal and displacement maps for use in Maya. I will still use my existing process of painting the Colour, Translucence, and Specular maps in Photoshop.

With the design of my Spaceman now complete, to move on and start modelling I first need to draw him from as many angles as required to model his features. In the case of most characters you can get away with just drawing the front and the side orthographic views but, in my case because of his chest pack I needed to draw front, side, back and top views. I didn't use the posed character in Maya but I included it just to add a bit of character to my model sheet.

Orthographic views of my spaceman character.
The modelling process so far has taken about 2 days, which I have had to spread out over any spare time I have in between classes and also down time at home. 

This is where he is up to at the moment. I have mostly finished and all that is left is to figure out how his pack is connected to the body. At the moment its just floating there in space but my initial idea was to have a modelled piece of soft padding in between the hard metal shell of the pack and his fleshy soft bits, aren't I kind!


Modelled Spaceman.
I hope that you have enjoyed a breakdown of my process, I will update again later as more of the pipeline is completed.

Ciao.